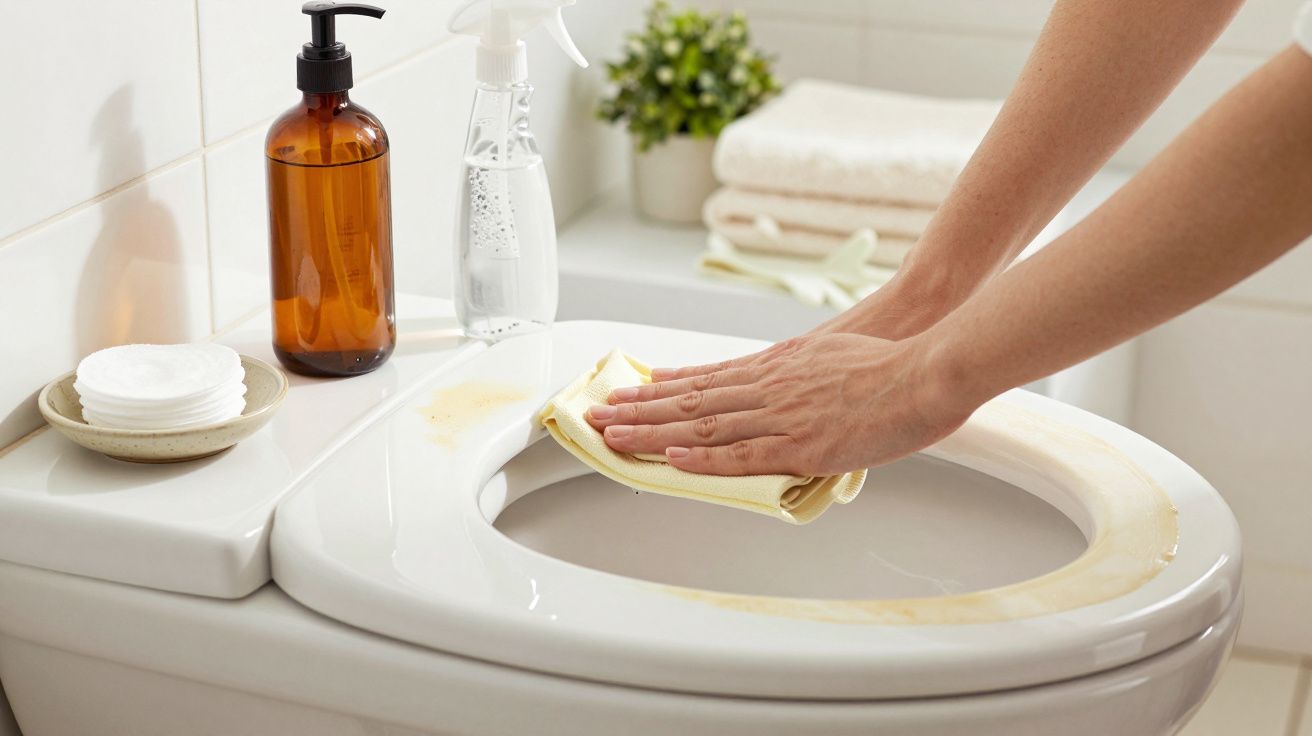
It’s the toilet seat. Once white, now vaguely yellow, with a sort of tired film that won’t budge. You’ve scrubbed, sprayed, let foam sit “as directed,” and still that old-bathroom tint clings to the plastic like a bad memory.
One evening, you’re standing there, bottle of classic bleach in hand, wondering if you should just order a new seat and be done with it. A friend laughs on the phone and says, “You know you’re using the wrong liquid for that, right?” You roll your eyes… until you try it. The next morning, the seat looks different. Cleaner. Brighter. Almost new.
There’s a forgotten bottle in your bathroom that can do what your usual products can’t. And you’ve probably walked past it a hundred times.
The Strange Case of the Yellowed Toilet Seat
The scene is almost always the same: bright tiles, shiny chrome faucet, and then that off-white ring you’d rather guests didn’t see. The toilet is clean, yes, but the seat still looks tired, with a beige halo that screams “old rental” even in a fresh remodel. You wipe it before people come over, almost by reflex.
In a photo, the yellow stands out even more. You zoom in, wince, and suddenly the whole bathroom feels less hygienic, even if you just scrubbed everything. That small plastic surface becomes the thing you can’t unsee. And it’s rarely about dirt. It’s about time written into the plastic itself.
A London-based cleaning company recently shared that complaints about “permanently dirty toilet seats” have jumped in the last five years, especially from people in newer apartments. One tenant sent photos of a three-year-old seat already turning a dull cream, despite regular cleaning with name-brand sprays. Another swore she scrubbed weekly with bleach, only to watch the plastic slowly yellow anyway.
On social media, the topic explodes every few months. Someone posts a before-and-after that looks like witchcraft, thousands of comments roll in, and you realize half the internet is traumatized by the same yellow ring. People confess they changed the whole seat out of embarrassment. Some even tried repainting it. A few admit they just avoid looking directly at it.
The thing is, most “toilet cleaning” products are designed for the bowl, not the seat. Bleach can whiten porcelain, but it often does the opposite on aging plastic. The seat absorbs pigments from urine droplets, self-tanner, cleaning chemicals, even sunlight. Over time, the surface gets microscopic scratches where stains cling and oxidize. That’s why scrubbing harder doesn’t help. You’re just roughing up the plastic, giving stains more places to hide.
The real solution isn’t in the harsh stuff. It’s in a gentler liquid quietly sitting by your toothbrush.
The Forgotten Bathroom Liquid That Actually Works
The unsung hero here is plain, old hydrogen peroxide-the antiseptic liquid many people keep for small cuts or mouth rinses. In a 3% solution, it looks innocent, almost like water. Yet on yellowed plastic, it works like a slow, patient eraser. Not by stripping the surface, but by breaking apart the molecules that cause the yellow tint.
The trick is to treat your toilet seat like a mini whitening project, not like a quick wipe. You don’t just splash and rinse. You create contact and time. That’s where the magic happens.
The method is oddly simple. Remove the seat if you can, so you can work comfortably. Clean it first with a mild soap to remove everyday grime. Then soak sheets of paper towel or cotton pads in hydrogen peroxide and lay them flat over the yellowed areas. Wrap the whole thing in plastic wrap to keep it from drying out. Leave it for a few hours, or overnight if the stains are old.
The next morning, you peel everything back and rinse. The result isn’t a dramatic “TV commercial” moment with sparkles flying everywhere. It’s quieter than that. The plastic just looks fresher, lighter, like someone turned down the sepia filter. In stubborn cases, a second round brings it even closer to its original white.
On Reddit and cleaning forums, the same story repeats. A tenant in Manchester shared pictures of a disgusting-looking seat in a shared apartment. Years of use, a brownish-yellow cast that no bleach touched. She tried the hydrogen peroxide wrap as a last resort. Eight hours later, the seat was at least two shades lighter. After a second treatment over the weekend, it looked almost new except for a few deep scratches.
Another user, a young dad, admitted he was seconds away from throwing his toilet seat out. Instead, he bathed it in a plastic storage bin filled with diluted hydrogen peroxide, left it in the sun on the balcony, and forgot about it for half a day. The combination of peroxide and daylight boosted the whitening reaction. He posted an almost suspiciously good before-and-after, insisting he hadn’t used any filter.
We tend to underestimate how often plastic can be rescued. On a microscopic level, hydrogen peroxide breaks down into water and oxygen. That oxygen attacks the chemical bonds inside the yellow molecules stuck in the plastic. It doesn’t repaint the seat; it dismantles the stain from the inside. That’s also why the process isn’t instant. The liquid needs time to seep into the surface and do its work.
Classic chlorine bleach, in contrast, can react with the plastic itself, not just the stains. Over repeated uses, it can speed up yellowing or leave chalky marks. The peroxide route is slower but gentler. It’s the difference between sanding a table and gently lifting an old water mark. And in a small space like a bathroom, working with a low-odor product is a quiet relief.
There’s also something oddly satisfying about watching a tired object regain its color. You realize the seat didn’t need replacing. It just needed the right kind of attention.
How to Use Hydrogen Peroxide on Your Toilet Seat Without Ruining It
The most effective routine starts with a reset. Give the seat a quick wash with warm, soapy water and a soft sponge, then dry it. No abrasives, no scouring pads. You want the surface as clean as possible, but not scratched. Then grab your 3% hydrogen peroxide-the kind sold in pharmacies-and some absorbent paper.
Pour the peroxide into a small bowl. Soak layers of paper towel, wring them just enough so they don’t drip, and lay them gently on the yellowed areas. Cover everything with plastic wrap to keep the liquid from evaporating. That small greenhouse effect helps the peroxide stay active longer. Leave it at least two hours. For an older seat, leave it overnight, ideally when nobody needs the bathroom.
The next step is almost ceremonial. Remove the wrap, lift the paper, and toss it. Rinse the seat thoroughly with clean water, then wipe it dry. If you notice patchy areas, repeat the process on those spots only. Working in stages keeps you from overdoing it and lets you see how the plastic reacts. The goal isn’t laboratory perfection. It’s to shift the overall tone from “tired” to “decently fresh.”
On a practical note, wear gloves. Hydrogen peroxide at 3% is mild, but on sensitive skin it can cause temporary whitening or tingling. Protecting your hands lets you work calmly, without rushing. Also, keep the bottle away from direct sunlight and heat so it stays effective longer. A cabinet under the sink is usually fine.
Most people make the same three mistakes with yellowed seats: they scrub like crazy with rough sponges, they flood the plastic with undiluted bleach, and they give up way too soon. Let’s be honest: nobody actually does this every day.
Harsh scrubbing only makes things worse in the long run. It scratches the surface, so each new stain has more tiny holes to sink into. Strong bleach, used too often, can distort the finish or create uneven, chalky patches. And doing a whitening treatment once for 20 minutes, then declaring it “doesn’t work,” is like quitting a skincare routine after three days.
An easier rhythm is to do one big “rescue” treatment using hydrogen peroxide, then stick to gentle care. Wipe the seat with a mild bathroom spray or diluted dish soap during your normal clean. If you notice a new yellow tinge a few months later, one short peroxide session brings it back. It becomes maintenance, not a crisis.
There’s also the emotional side. During a busy week, a yellow seat feels like proof the house is slipping out of control. During a calmer week, the exact same seat is “something we’ll handle on Saturday.” On a human level, that tiny piece of plastic carries more mental weight than its size suggests.
“I didn’t realize how much that ugly toilet seat was bothering me until it looked white again,” confided Emma, 32, who tested the peroxide trick in her rented apartment. “It sounds stupid, but it made the whole bathroom feel lighter. I stopped apologizing to guests for it.”
There are a few situations where whitening isn’t the answer:
- Deep cracks, rough edges, or loose hinges are a safety issue, not just cosmetic.
- Old wooden seats with chipped varnish don’t respond the same way as plastic.
- Seats with heavy blue or colored stains may come from hair dye or cleaning chemicals and won’t always fully fade.
Knowing when to stop trying and simply replace the seat is part of the process. A basic new seat is cheap. The real gain is understanding that yellow doesn’t automatically mean “dirty,” and that not everything needs to go to a landfill at the first sign of age.
What This Tiny Makeover Changes in Your Bathroom
Once you’ve seen a yellowed seat return to a cleaner white, it’s hard to unsee what’s possible. That little win has a ripple effect. You suddenly look at other “lost causes” with more curiosity than resignation: the shower pan, the light switch plates, the plastic window handles. Not everything is doomed to age badly.
On a daily level, the bathroom feels less like a half-finished project. You stop mentally editing it when guests say, “Can I use your bathroom?” The seat simply blends into the background again, which is exactly where you want it. It’s a small relief, almost invisible, but your brain registers it-one less source of low-grade irritation.
There’s also a quiet satisfaction in using a humble first-aid liquid to outsmart a marketing industry built on single-use solutions. The fact that the “answer” doesn’t come in a neon bottle labeled “Toilet Miracle Ultra” makes the result feel even better. Something about learning how materials really behave-plastic, light, oxygen-changes the way you consume.
In a shared apartment, this kind of trick has social weight. One person does the experiment, posts a photo in the group chat, and the others start noticing details they ignored. Cleaning stops being just a chore and turns into a low-key science project, almost a team sport. You trade tips. You swap products. You laugh at the weird things you found under the hinges.
We’ve all had that moment where a guest closes the bathroom door and you suddenly remember the one thing you forgot to fix: the yellowed seat, the fogged mirror, the towel you meant to change. A simple peroxide treatment doesn’t rewrite your whole life, but it subtly rewrites that scene.
You might not rush out to buy hydrogen peroxide today. But the next time you catch that beige halo out of the corner of your eye, you’ll know it isn’t permanent. Under the yellow, the white is still there, waiting. And that thought alone changes how you look at the room where you start and end most days.
| Key point | Details | Why it matters to readers |
|---|---|---|
| Use 3% hydrogen peroxide, not stronger | Pharmacy-grade 3% solution is strong enough to break down yellowing pigments without damaging most plastic toilet seats. Higher concentrations are harder to handle safely at home and can over-whiten or irritate skin. | Readers avoid buying the wrong product or something unnecessarily harsh, so they get results without risking burns, ruined finishes, or wasted money. |
| Keep the seat wet for several hours | Soak paper towels or cotton pads in peroxide, cover yellowed areas, and wrap with plastic wrap to prevent drying. Leave for 2–8 hours depending on how old the stains are. | People often think “it doesn’t work” because they rinse too fast. Understanding the need for contact time is what turns a disappointing test into a real transformation. |
| Combine peroxide with gentle cleaning habits | After a big whitening treatment, switch to soft sponges, mild soap, or non-bleach sprays for weekly cleaning. Reserve peroxide for occasional refreshes when yellowing comes back. | This keeps the seat looking bright for months instead of days, and helps readers avoid the cycle of over-scrubbing, scratching, and premature replacement. |
FAQ
- Can I use household bleach instead of hydrogen peroxide? Bleach will disinfect the seat and sometimes lift light stains, but it often makes plastic yellow faster over time. It can also leave patchy, chalky areas if used too often. Hydrogen peroxide works more gently on the pigments themselves, which usually gives a more even, natural-looking white.
- How long does the whitening effect last? In a typical family bathroom, the effect can last several months before you notice a slight yellow tinge returning. The exact timing depends on things like sunlight, splashes of urine, self-tanner, and cleaning habits. A quick 1–2 hour touch-up with peroxide once or twice a year is usually enough to keep the seat bright.
- Is hydrogen peroxide safe to use around children and pets? At 3% concentration, it’s commonly used on skin and in mouthwashes, so it’s considered low-risk when handled properly. Wear gloves, don’t leave soaked paper within reach of small hands or paws, and rinse the seat thoroughly after treatment. Once dry, there’s no active product left on the surface.
- Will this work on any type of toilet seat? It works best on white plastic seats made from materials like polypropylene or thermoplastic. On painted wooden seats or colored plastic, results are less predictable and may only lighten stains slightly. If your seat is cracked, flaking, or very rough, replacing it is usually safer and more hygienic.
- Do I have to remove the toilet seat first? No, you can treat it in place if the hinges are awkward or you rent and don’t want to mess with the hardware. Just protect nearby surfaces with an old towel and keep the peroxide-soaked paper precisely on the plastic. Removing the seat simply makes it easier to reach the edges and underside.
- What if the yellow stains don’t disappear completely? Some very deep or old discoloration can be permanent, especially if the plastic has chemically aged. A second or third long treatment usually improves things further, but there are limits. If you see no change after several attempts, the pigment is likely too embedded, and a new seat might be the better choice.


Comments
No comments yet. Be the first to comment!
Leave a Comment