It usually starts with a tiny sting of embarrassment. You lift the toilet lid to give the bathroom a quick wipe before guests arrive and suddenly see it: that tired, yellowed toilet seat that never looks truly clean, no matter how much bleach you splash on it. You scrub, you spray, you hold your breath, you wait. The plastic still looks aged, stained, vaguely dingy. Not dirty, exactly. Just… old.
You wonder if it’s time to replace the whole seat, you scroll through shiny photos of spotless bathrooms on your phone, and you feel that small, annoying gap between your reality and those images.
And then you hear someone mention a product you already have at home. A forgotten bathroom liquid that doesn’t promise miracles in ads, yet quietly does exactly what you’ve been begging your cleaning sprays to do.
The Yellow Toilet Seat Problem Nobody Talks About
The first thing people usually blame is themselves. “I must not be cleaning right.” “Maybe I left bleach on too long.” “Maybe my bathroom is just cursed.” Yellowed seats have this humiliating way of making a whole room feel neglected, even when you know you wipe down surfaces, mop floors, and change towels regularly.
You can disinfect that seat every day and it still looks like a rental from the ’90s. The plastic turns matte, the edges stain faster, and those pale, nicotine-like shadows appear around the hinges. Deep down, you suspect it’s just what plastic does with time. You almost resign yourself to it.
A friend of mine, Léa, had the classic rental bathroom: beige tile, harsh overhead light, and a toilet seat that seemed permanently yellowed. She tried everything she found on cleaning TikTok: bleach soaks, baking soda paste, even a magic eraser that left the plastic a little scratched.
One Sunday afternoon, while juggling laundry and a crying toddler, she grabbed a bottle of old-school liquid she usually kept for rinsing her hairbrushes and cleaning the sink. Twenty minutes later, she called me, half laughing and half stunned. “You’re not going to believe this,” she said. “My toilet seat looks like it came out of the box.”
The product? Plain, boring, totally overlooked: liquid hydrogen peroxide-the 3% antiseptic most of us forget in the back of the cabinet.
There’s a simple reason this works so well on yellowed toilet seats. Plastic doesn’t just get “dirty”; it oxidizes and absorbs pigments from urine vapors, limescale, and cleaning products. Bleach can disinfect and even whiten fabrics, but on plastic it can sometimes react poorly, speeding up yellowing or leaving uneven marks.
Hydrogen peroxide, on the other hand, is a gentler oxidizing agent. It breaks down the organic molecules that cause those yellow tones without attacking the plastic as aggressively. It’s often used in low concentrations to lighten stains on grout, silicone joints, and even to restore yellowed electronics. On a toilet seat, it’s like pressing a soft reset button. Not a miracle-just chemistry quietly doing its job.
The Forgotten Bathroom Liquid-and How to Use It
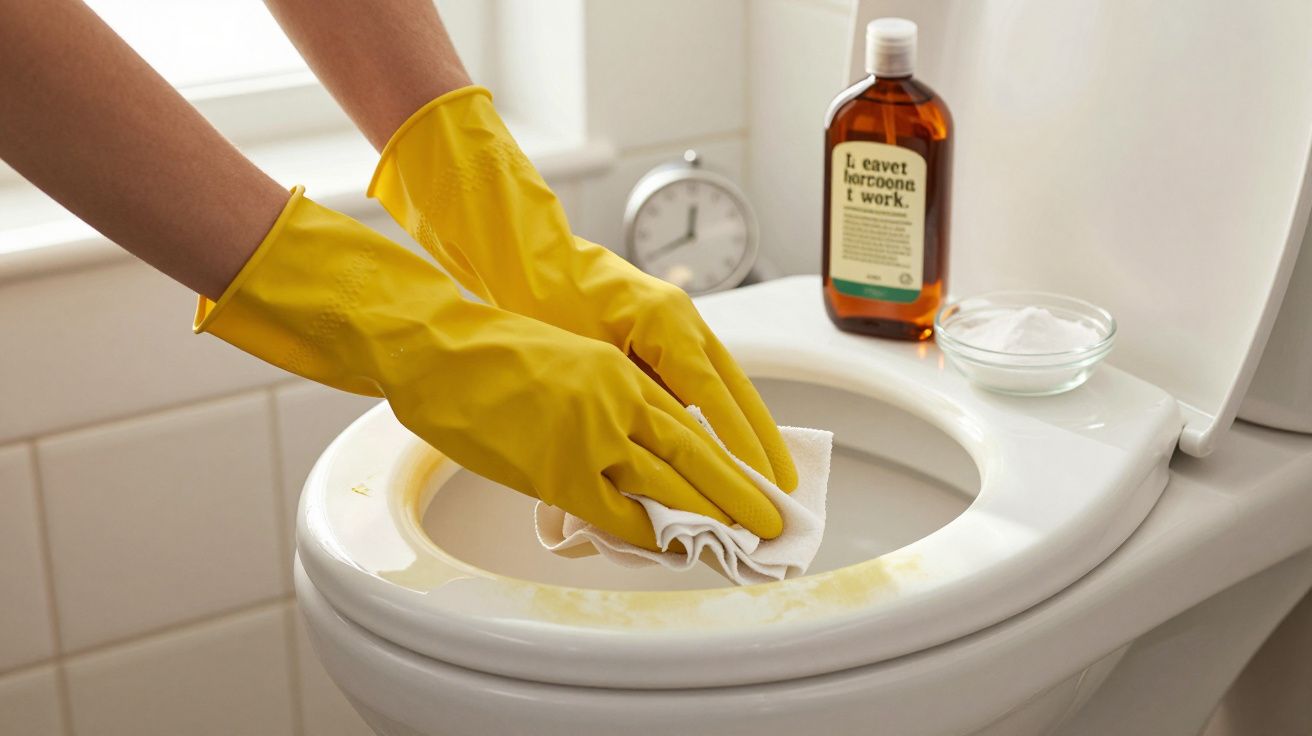
The method looks almost suspiciously simple. Start with a dry, reasonably clean seat: a quick wipe with soapy water is enough. Then take your bottle of 3% hydrogen peroxide and soak a few sheets of thick paper towel or cotton pads with it.
Lay those soaked sheets over the yellowed areas, pressing lightly so they cling to the surface. You want a kind of “peroxide compress” covering the plastic. Leave it for 20 to 40 minutes, depending on how stubborn the stains are. When you peel everything off and wipe with a clean cloth, the difference is often visible right away. The seat looks brighter, fresher, less tired. Sometimes you need a second round, but the before-and-after can be striking.
This is where many people go wrong: they treat peroxide like any random spray and just mist it quickly, then wipe. That does almost nothing on old yellowing. The contact time is what does the job. The liquid has to sit and work its way into those micro-pores in the plastic.
Another common mistake is mixing it with bleach or other strong products “for extra power.” Not only is that unnecessary, it can release fumes and irritate your throat or eyes. Use hydrogen peroxide alone on a clean surface. Ventilate the bathroom a bit, wear gloves if your skin is sensitive, and let the product quietly do its job while you do something else. Let’s be honest: nobody really does this every single day. This is an occasional rescue, not a new weekly chore.
“People throw away perfectly good toilet seats and buy new ones,” says a professional cleaner I spoke with, “when ten minutes of prep and a bottle of peroxide would bring most of them back to life. We’re so used to buying new that we forget what these old-school liquids can do.”
- Product to use: 3% liquid hydrogen peroxide, the same type sold in pharmacies or the first-aid aisle at the grocery store.
- Application method: Soak paper towels or cotton pads, apply as a compress, leave 20–40 minutes, then wipe.
- Best surfaces: White or light-colored plastic seats, around hinges, underside of the lid.
- Extra boost tip: For very old stains, lightly rub with a soft toothbrush after the compress phase.
- What to avoid: Mixing with bleach, scrubbing with abrasive pads, or leaving the plastic permanently wet around the hinges.
When a Toilet Seat Becomes a Small Act of Self-Respect
Once you’ve seen your own yellowed toilet seat brighten up in under an hour, something shifts in the way you look at everyday objects. The bathroom stops being just that place you rush through in the morning and starts feeling a bit more like a room you actually live in. A white, clean-looking seat changes the whole mood: the tile seems less dull, the mirror a little kinder.
There’s a quiet satisfaction in knowing you didn’t just throw plastic away-that you used what you already had. It’s not a grand environmental gesture. It’s simply a smarter, more grounded way to deal with the wear and tear of daily life. And it’s oddly contagious: after the seat, people start trying the same bottle on yellowed silicone, shower corners, even the plastic around old light switches.
| Key point | Detail | Value for the reader |
|---|---|---|
| Forgotten product | 3% liquid hydrogen peroxide used as a “compress” on plastic | A cheap, accessible way to brighten yellowed toilet seats without replacing them |
| Right method | Clean seat, apply soaked paper, leave 20–40 minutes, wipe and repeat if needed | A step-by-step process that’s easy to follow and fits into a busy day |
| Long-term mindset | Avoid harsh abrasives and overusing bleach, ventilate, clean gently but regularly | Keeps the bathroom fresher longer and reduces unnecessary purchases |
FAQ
- Can I use hydrogen peroxide on colored toilet seats?
Yes, but test a hidden area first. On strong colors or patterned plastic, repeated use can slightly lighten the shade-so go slowly, and don’t leave it on longer than 20 minutes the first time.- Is hydrogen peroxide safer than bleach for toilet seats?
At 3% concentration, it’s generally milder on plastic and less likely to cause that chalky, “burned” look over time. You still need ventilation and basic precautions, but it’s usually gentler on both surfaces and your nose.- How often can I repeat this brightening treatment?
Most people only need it every few months. If your bathroom is very humid or heavily used, once every 4–6 weeks is usually enough. Daily or weekly use isn’t necessary and doesn’t add extra benefit.- What if my toilet seat stays yellow after using peroxide?
Some plastics are deeply aged or discolored all the way through, not just on the surface. If two or three treatments don’t change much, the material has probably reached the end of its cosmetic life and replacement may be the only option.- Can I use this trick on other bathroom surfaces?
Yes, carefully. It works well on white silicone joints, some plastic accessories, and grout lines. Avoid natural stone, and always test a tiny area first. Rinse well afterward to prevent residue.


Comments
No comments yet. Be the first to comment!
Leave a Comment